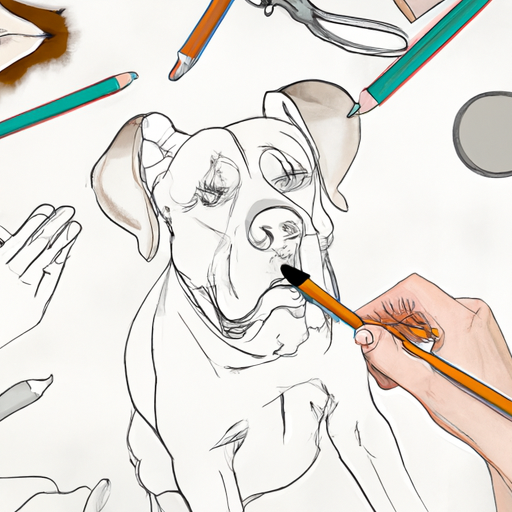
Drawing a dog is like piecing together a puzzle; each part has its own place and importance. You’re not just sketching an animal, you’re creating your very own canine masterpiece.
Whether it’s a playful pup or a dignified older dog, we’ll guide you step by step on how to capture the essence of man’s best friend.
We’ll begin with basic shapes, making sure you get the proportions right.
Next, we’ll move onto the face, adding expressive details that bring out their unique character and personality.
Sketching the body comes next where we’ll ensure every line and curve reflects their breed-specific features accurately.
Then it’s time to tackle fur texture – from silky smooth coats to shaggy hairdos.
And finally, perfect those last details that make your drawing come alive.
Ready? Let’s unleash your creativity as you learn how to draw dogs!
Starting with Basic Shapes
Let’s kick things off with a fun fact: every dog, no matter the breed, can be drawn starting with just a few basic shapes! This principle is known as shape recognition, and it’s your first step towards mastering canine sketching.
Grab your pencil and begin by drawing two overlapping circles for the body and head. Consider it as an exercise in basic geometry. The larger circle represents the dog’s chest, while the smaller one forms the head.
Then, add two more circles for snout and nose placement. For legs, draw four cylinders under the body circle. Don’t forget triangles for ears or tail, depending on your dog breed of choice!
Remember, these shapes are guidelines that’ll help you capture key features of dogs before adding intricate details.
Adding Details to the Face
Did you know that nearly 94% of pet owners say their animal companion makes them smile more than once a day? So, go ahead and add that infectious joy to your canine depiction by detailing the face with expressive eyes and a cheerful mouth. The key is in exploring the unique nuances of canine expressions.
Start with those soulful eyes. Using eye detailing techniques, sketch almond-shaped eyes slightly tilted inward at the top. This will give your drawing an authentic dog-like appearance. Don’t forget to add a glimmering detail for that spark of life!
Next, tackle the nose – remember it’s broad at the base and tapers up towards the forehead. Lastly, draw a wide, upward curved line beneath to mimic that friendly canine grin. Practice these details until they feel natural; soon enough, you’ll master capturing our furry friends’ spirit on paper!
Sketching the Body
Moving onto the physique, it’s essential to capture a dog’s unique body shape and posture, which varies significantly across breeds. Grasp the dog anatomy basics: think about the size and position of their rib cage, length of their legs and tail, or the amount of fluff in their fur coat.
Start with basic shapes like circles or ovals for the chest and hindquarters. Connect these with a straight line to represent the spine. Canine posture variations are key here; whether your dog is sitting, standing or running will change its form dramatically.
Pay attention to proportions – typically, a dog’s body is longer than it is tall. Sketch lightly at first so you can easily correct any mistakes. Remember that practice makes perfect; keep sketching until you’re happy with your furry friend!
Incorporating Fur Texture
Incorporating fur texture into your sketch might seem like a Herculean task, but it’s not as challenging as deciphering hieroglyphics! Start by understanding that the direction of fur growth is crucial.
Observe your dog and see how its fur flows in different areas – around the face, down the back, or along the legs.
Next up are fur shading techniques. Lightly sketch out fine lines following the direction of hair growth. Remember, fur isn’t uniform; some areas will be darker than others due to shadows or color variation in their coat. Use a range of pencils from soft (B) to hard (H) to represent these differences.
Finally, choosing appropriate colors can bring your drawing to life. Dogs come in various shades so don’t shy away from experimenting with browns, blacks, and whites for a realistic look.
Perfecting the Final Details
Nailing the final details can truly transform your sketch from good to extraordinary, don’t you agree? Shading techniques and highlight placement are crucial in this phase, creating a sense of depth and realism.
| Shading Techniques | How they enhance your drawing |
|---|---|
| Hatching | Builds texture; great for fur depiction |
| Cross-hatching | Adds depth; perfect for eyes & nose shading |
| Stippling | Useful for conveying color gradients in fur |
Now, onto highlight placement…
| Highlight Placement | Why it’s important |
|---|---|
| Eyes & Nose Tips | Brings life into your dog’s face |
| Fur Highlights | Emphasizes the glossiness of the coat |
Remember, always consider light direction when placing highlights. Experiment with different techniques until you find what works best for you. Your dog sketches will be paw-fect before long!
Frequently Asked Questions
What types of drawing materials are best when trying to draw dogs?”
Choosing your drawing materials is vital. For detailed, visually striking dog sketches, a pencil hardness variety is key. Experiment with charcoal versus graphite to find which captures fur texture and shading best for you.
Can you provide some tips on drawing different breeds of dogs?”
Sure, start by mastering dog anatomy basics. Pay attention to breed specific features like poodle’s fluffy curls or bulldog’s wrinkled face. Consider their body structure, fur texture and unique traits for a realistic depiction.
How long should I practice drawing dogs each day to enhance my skills?”
Like climbing Everest, honing your art takes time. Your drawing motivation should fuel 1-2 hours of practice daily. Be disciplined with time management, make each stroke count. Remember, Rome wasn’t built in a day!
Are there any specific drawing exercises to help improve my ability to draw dogs?”
Sure, studying dog anatomy and practicing sketching techniques are key. Draw different breeds to understand variations in structure. Practice sketching their skeletal framework and muscles, focusing on the head, body, legs and tail.
Can you recommend any online resources or tutorials for drawing dogs?”
Like a budding Picasso, delve into ‘Proko’ or ‘Art Studio Life’ online. They’ll guide you with dog anatomy understanding and using reference photos. Just remember, practice makes perfect in the world of art!
Conclusion
In the end, you’re not just a Picasso of pooches, you’re a veritable Van Gogh of hounds!nnYou’ve turned simple shapes into stunning canine masterpieces.nnWith each stroke of your pencil, you’ve added life to those furry faces and bodies.nnYour dedication has transformed blank pages into doggy wonderlands.nnKeep practicing and perfecting those details because before long, even the dogs themselves will be howling your praises!


